Button Builder
Introduction
Use Button Builder in combination to create a button that you can place in an existing menu on the site.
Example use
Create the ability to select one or more customers / DIDs (Direct Inward Dialing)
-
Supplement with additional information from a form.
-
Then, run Script Forge to send that data outside the system or perform bulk operations that may require repetition.
Create new button
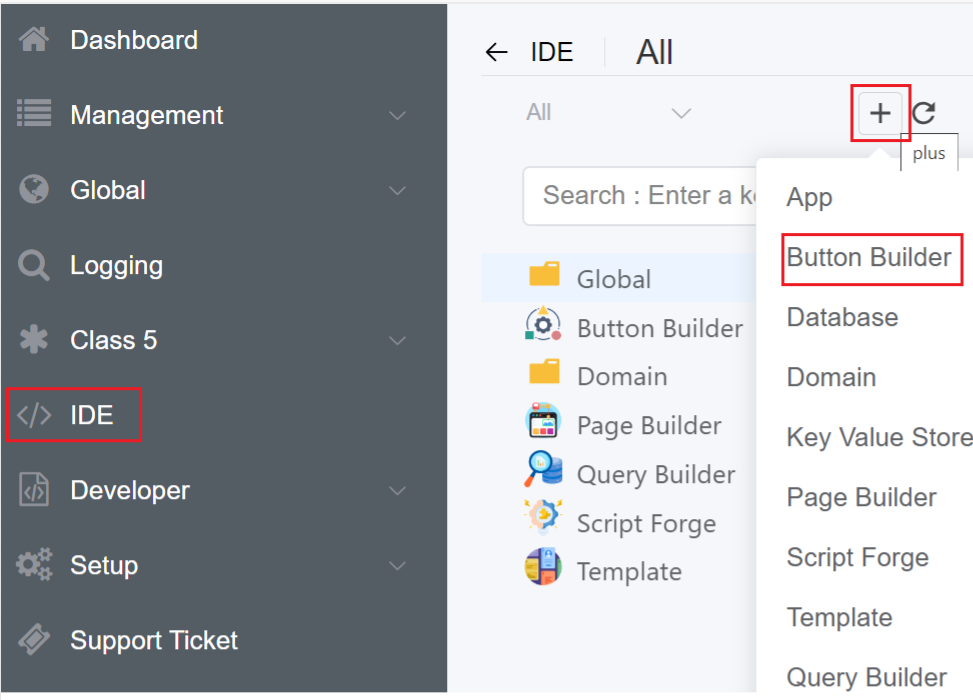
- Login to your account.
- Navigate to IDE
+sign Button Builder.

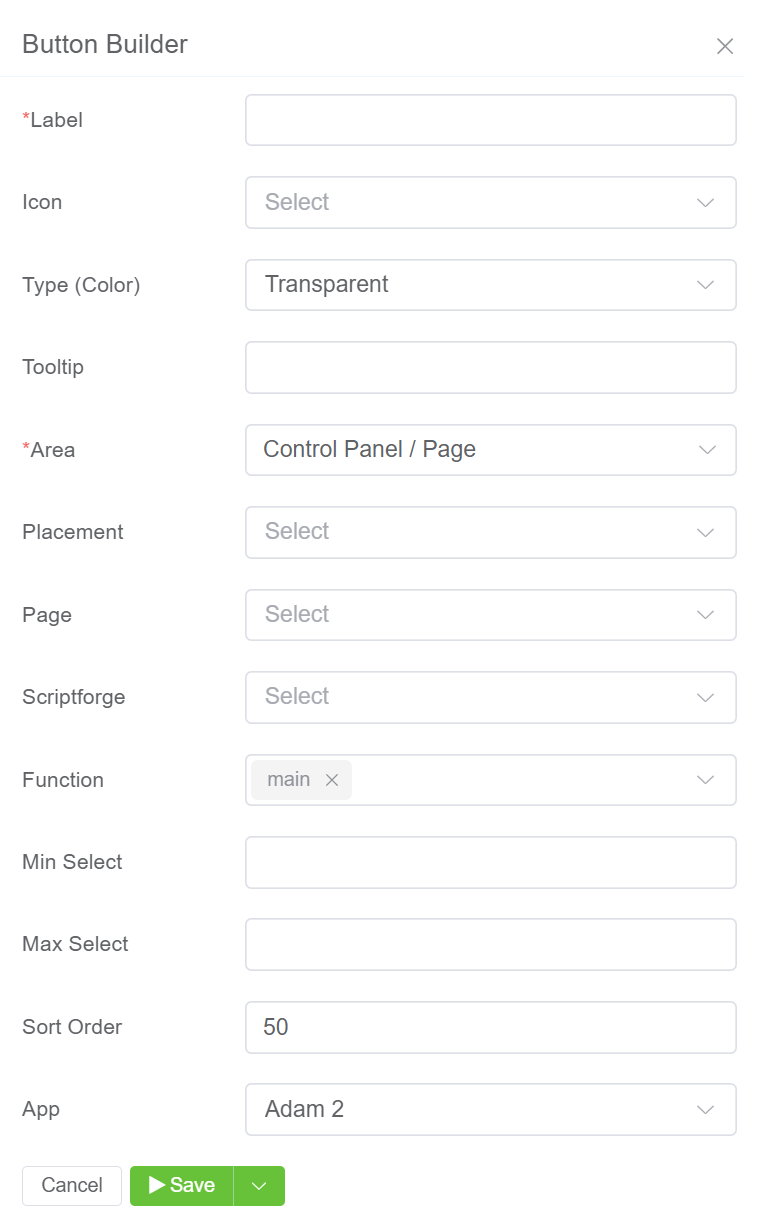
- Label: Enter the button label.
- Icon: Select an icon to display.
- Type / Colour: Select the button colour.
- Tooltip: Include a brief description of the button.
- Area: You can select the region where you place your button like Control Panel, Customer Portal or Webphone.
- Control Panel: You can place the button either on Side Navigation bar, Page or Row(App). Row(App) allows you place the button in Actions Column next to 'Publish' if the 'App' record id matches with button-builder 'app_id' then display the button.
- Customer Portal: You can place the button either on Side Navigation bar or Page.
- WebPhone: You can place the button either on Side Navigation bar, Page or Footer Navigation.
- Placement: This selection will display the button at the top of the Customers list, Carriers list, or Invoices.
- Company: Select the company from the drop-down.
- ScriptForge: When you click the button, select Script Forge (if any) to launch.
- Function: It has 2 uses:
- The selected function will executes when you select ScriptForge.
- When using services like the WebPhone, the function can perform additional tasks on the page, like placing or terminating a call.
- Page: Page is the dynamic page that the button opens when clicked.
- App: Select the application you want to place your button.
- Min / Max Select: When there are no choices, the button is still accessible. Limitations entered will apply mix/max limits to the selection.
- Sort Order: You can use this option when you have multiple buttons. It lets you select the arrangement of the buttons. The lower the sort order defines which ones comes first.
2.Click Save to make the new button available for placement.

3.The created Button will be visible on the IDE panel under Button Builder. Click on the created button, also you have the option to Edit the button.
