Pages
Using Page Builder, you can customise the Control Panel, Customer Portal, and Web Phone. Pages help you enhance the functionality of these interfaces.
You can add Pages to several areas of these interfaces, such as Carrier, Customers, and Rate cards.
A page can be interactive, containing completed forms and then processed by ScriptForge.
Pages work together with Button Builder to display a page on any Navigation bars.
The Elements in the Pages are powerful and increase flexibility for the features you want to include in your portal.
Usage Cases
-
You can use Pages to redirect to any rule-book or manuals that you want to show your customers.
For example, you can create a rule-book on how to use Script Forge with forms.
Another example may include a manual with all the information on the offered services and the corresponding payments.
-
Interaction with external links using Scriptforge and integration with Pages.
-
You can use Pages to create interactive content. For example, getting input from the customers.
-
Server-side and client-side validation.
-
If you are using Webphone, you can collect the data in the form created in Pages.
-
Customers may create their payment processors. They can create their interface using Pages on the website. The integration of the processing system uses Scriptforge for execution.
-
Number Porting: You can create a form (using Pages) on the Customer Portal and ask for details. Once the form gets submitted, the requests reach Scriptforge for validation purposes. Scriptforge can update the customer on the status of their processed request.
Build Form
-
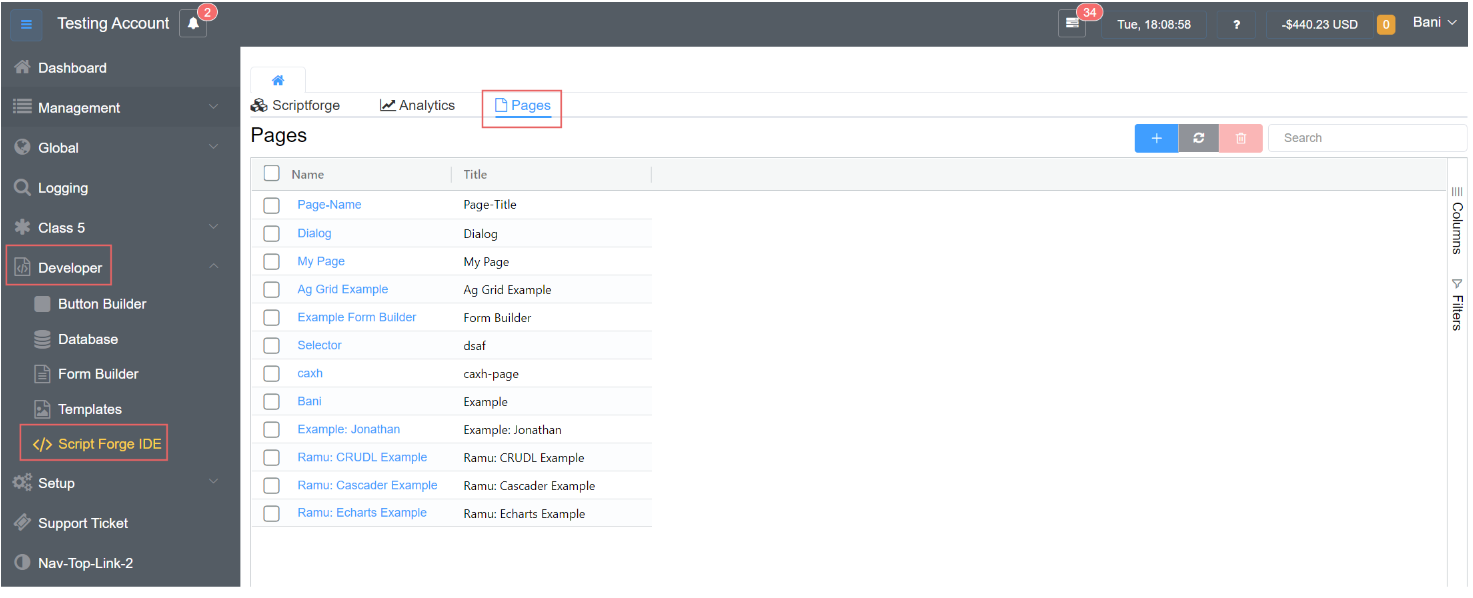
Navigate to Developer Scriptforge IDE Pages and click
 to create a new form.
-
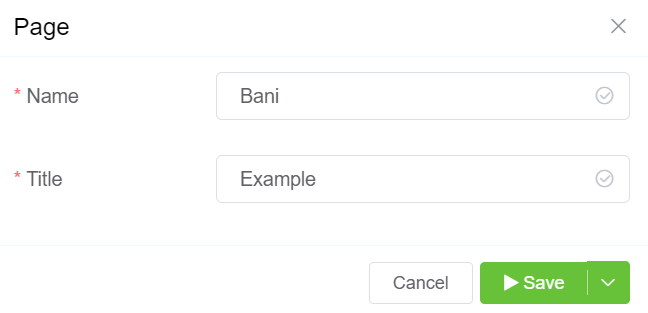
Complete the form's Name and Title fields, then click Save.
-
When you see the screen with the various pages, click on the form you created (Bani in this case).
-
A screen with options such as Basic Field, Advance Field, Layout, Component Attribute, and Form Attribute enables you to design attractive and interactive interfaces for your customers.

Basic Fields
Know More
Click on each Icon to find out more about each element.
Advance Fields
Know More
Click on each Icon to learn more about each element.
Layout
Know More
Click on each Icon to learn more about each element.
You can change the characteristics of each component. You can click on Component Attribute to change the properties of the elements.
Form Attribute
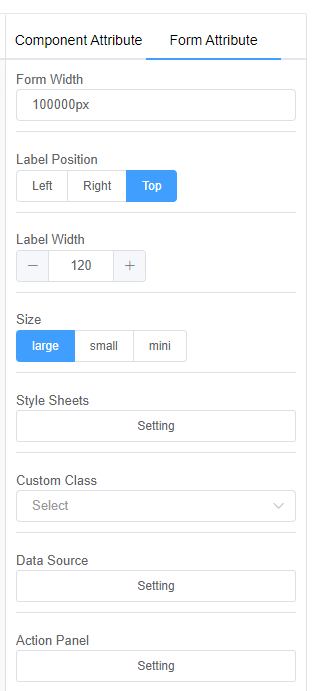
The Form attribute helps you specify values for the following parameters for all the fields in the form:
-
Form Width: Form width helps you decide the dimensions of the complete form.
-
Label Position: Label position helps you position the field labels.
You can decide between Left, Right and Top. -
Size: Size describes the dimensions of all the fields in the form.
You can choose from Large, Small, and Mini. -
Style sheets: You can add custom Style Sheets to make the interface look more pleasing.
-
Data Source: Data Source can be External, from Script Forge or a Database.
6. Action Panel: Action Panel allows you to specify the actions for buttons and link controls.
Configure Data Source
-
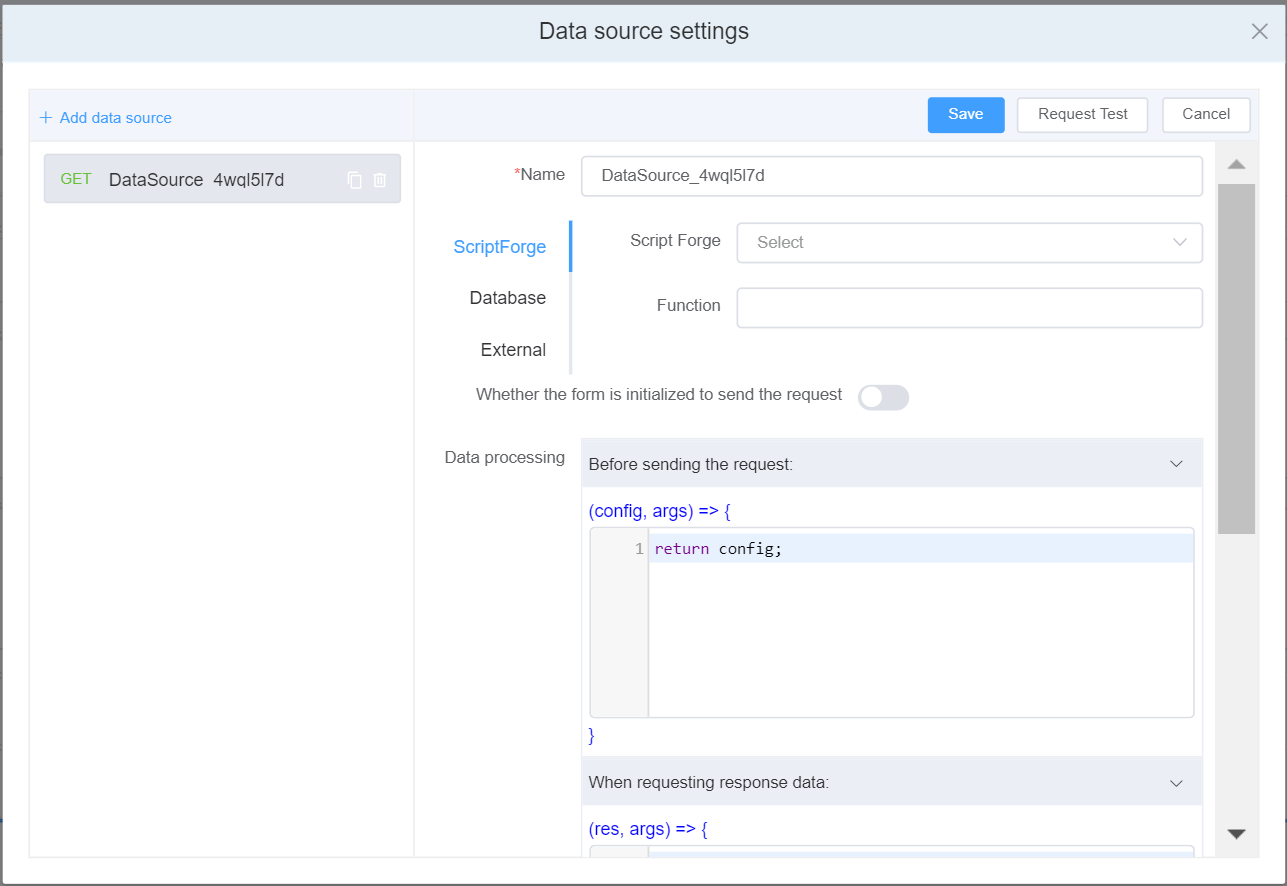
Click on the Data Source Setting.
-
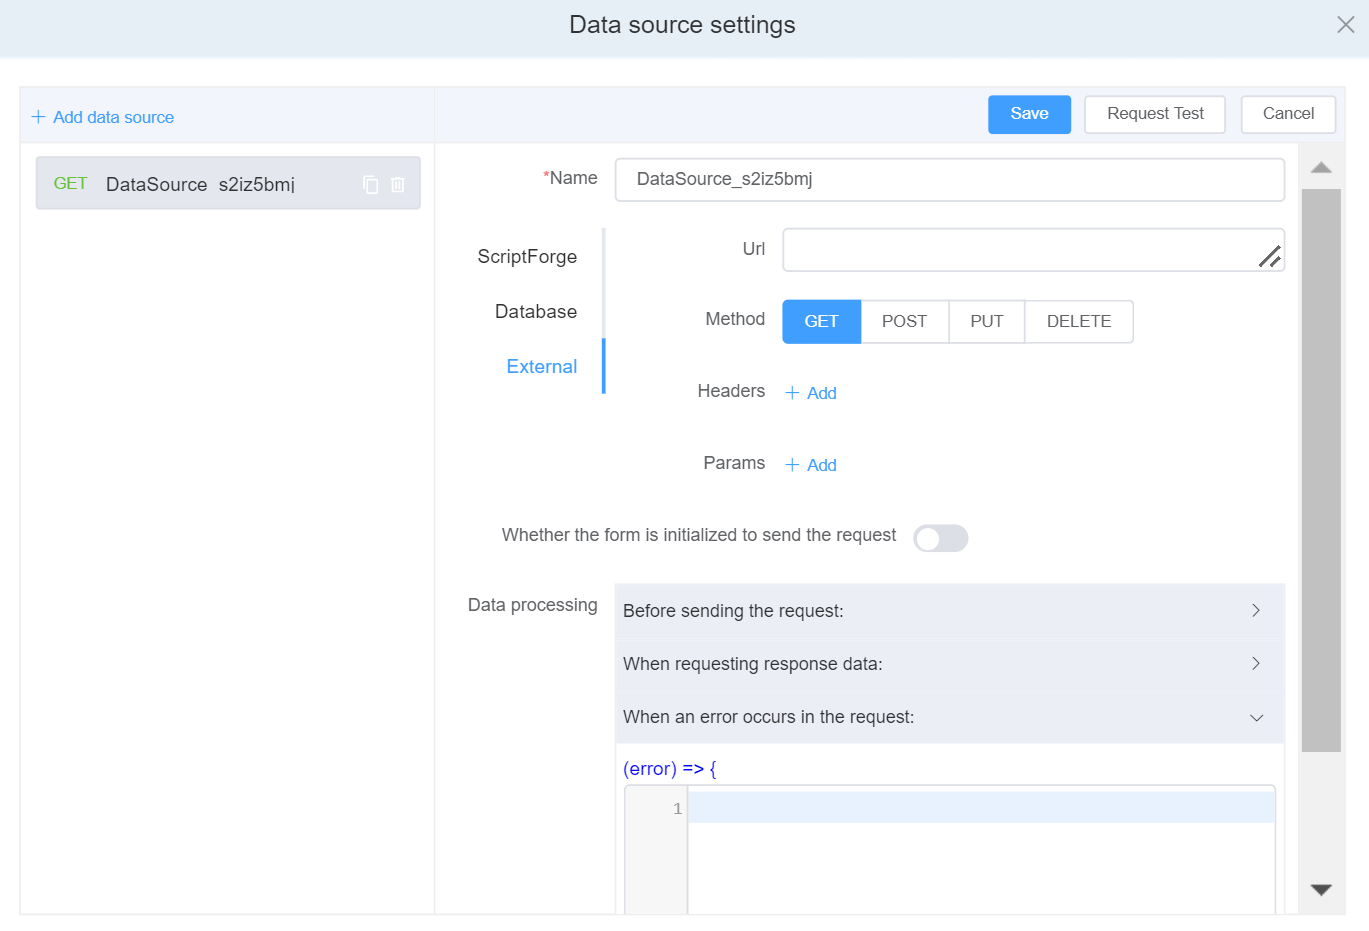
Click on Add Data Source, and the data source setting will appear on the right-side of the panel.
-
Name: The data source name, which must be unique, its used to display and select data sources.
-
You can select the Data Source from 3 options: Script Forge, External ( allows you to get data from external services to your end users.), and Database (Refer for API documentation).
4.1. External Data Source.
4.2 When you select External database you can select from 4 HTTP requests:
| Request Name | Description |
|---|---|
| GET | Use GET request to read / retrieve data from a web server |
| POST | Use POST request to send data (file, form data, etc.) to the server |
| PUT | Use PUT request to revise the data on the server. |
| DELETE | Use DELETE request to delete the data on the server at a specified location. |
-
Header:
- To send meta data
- Content Type - text/html or text/JSON
- Request authorization - authentication information
- Response caching
- Response cookies
-
Params:By using the params keyword, you can specify a method parameter that takes a variable number of arguments.
-
Whether the form is initialized to send the request: It's an asynchronous activity that sends an HTTP request and waits for a response from the web server.
-
Data Processing
| Data Processing Type | Description | Parameters |
|---|---|---|
| Before the request is sent | Before the request is sent, configure the parameters, headers, address and other options of the request. | 1. Modify the request address config.url = 'new request URL'. 2. Modify the request headerconfig.headers = {'X-Requested-With': 'XMLHttpRequest'}. 3. Modify request query parametersconfig.params = {ID: 12345}. 4. Request the data sent by the body, not applicable to GET requests config.data = {firstName: 'Fred'}. |
| When requesting to return response data | After the interface request is successful, the returned data can be processed. | res: The data returned by the interface can be processed here. |
| When an error occurs in the request | PUT request modifies the data on the server. |
7. Request Test
After completing the data source configuration, you can click on Request Test to verify the data source interface to check whether the filling is successful and whether the returned data is correct.
Preview Options

Click on the Preview button to view the form.
You can choose between the Monitor view, Tablet view, and Cellphone view.
-
Get Data: Get Data displays the raw data from the form.
-
Reset: Resetting will erase all the data filled in the form.
-
Disabled or Enabled Edit: Disabled edit won't allow you or your customer to enter data in the form; Enabled edit will allow you or your customer to enter the data in the form.
-
Print Read Mode: Print Read mode allows you to view the form before printing.
-
Print: The print option will let you print the filled form.
-
Close: Close will you exit from the preview window.


